
Summary: This article will teach you to create custom Image Buttons in Captivate. This is helpful when you want to have bigger buttons than given by Adobe. Although its possible to create Text Buttons and increase it to any size, it will not have any color or graphics.
Step 1: Have a look at the existing buttons in Captivate

filename_over
filename_up
When the mouse is over the button, it will display the image with the name Continue_over.
When the mouse is away from the button, it will display the image with the name Continue_up.
Step 2: Create three similar images

Step 3: Save your images

Extra Tips:
(Note: the below mentioned steps are for PowerPoint 2007 & 2010.)
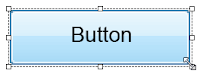
To create the button images from PowerPoint, open a new document and draw a rounded rectangle.
 Modify the border curves to make it look like a button.
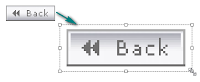
 Right click, select Edit Text to insert the text you want to display inside the button.
 When you double-click the shape, the Format menu on top will be enabled automatically. Here you can select from one of the many default styles for the shape that you have drawn. Just hover your mouse over the shapes to see a preview and click on one to finalize.
 Duplicate the shape using the shortcut CTRL+D. With the new shape selected, go to Shape Fill - Gradient. Under the Variations section, you will see that the direction of the gradient you have selected for the shape is highlighted. Select a different variation for the new shape. (This is for the 'over' button image i.e., when the mouse is over the button, a slight variation of the same shape will be shown.)


In Captivate 5, its possible to resize image buttons also, but it wont look good if extended beyond a certain limit.

So given below are a few simple steps to create Custom Image Buttons in Captivate.
- Go to this folder in your system - C:\Program Files\Adobe\Adobe Captivate 4\Gallery\Buttons

- You will notice that there are three images for each button with similar filenames.
filename_over
filename_up
- Down, Over and Up defines the state of the button. If the filename of a button is 'Continue', it will have three images: Continue_down, Continue_over, Continue_up.
When the mouse is over the button, it will display the image with the name Continue_over.
When the mouse is away from the button, it will display the image with the name Continue_up.
Step 2: Create three similar images
- You may use any software to create these images: Photoshop, PowerPoint, CorelDraw or even Paint.
- PowerPoint gives you some custom styles with different colour styles. (Read the Extra Tips at the end of this article to learn how to create the images from PowerPoint.)

Step 3: Save your images
- Save your images with the terminology mentioned in Step 1.
- Do NOT give names of existing Captivate buttons.
- Copy and paste the three files into Adobe Captivate's official buttons folder - C:\Program Files\Adobe\Adobe Captivate 4\Gallery\Buttons
Extra Tips:
(Note: the below mentioned steps are for PowerPoint 2007 & 2010.)
To create the button images from PowerPoint, open a new document and draw a rounded rectangle.


Now duplicate the shape once more and add a different style to the third button. We can use this for the 'down' state of the button.

The last step is to save the button images. Right click on the first shape and select Save as Picture option.

In order to use these images as Captivate buttons, be careful to adhere to the naming conventions mentioned in the above article. Repeat this for the other two shapes. You have thus successfully created the button images.
No comments:
Post a Comment