Given below is a short video which demonstrates how you can update the project captions in Captivate 5.5 easily. The Captions are exported into a Word Document where all the changes are made and then taken back into Captivate. Since you have the Captions in a word file, you can share this file with the SME / Client (who may not have Captivate installed); get the changes made by him/her and then update your project just with a few clicks.

Feb 14, 2013

Jul 2, 2012
Types of Recording in Captivate
There are three types of recording available in Captivate: Automatic, Full Motion and Manual. In this article, we will review these three in detail.
Automatic Recording: It is perhaps the most commonly used type of recording in Captivate. When you record using Automatic option, screen captures are done automatically by Captivate and each screen capture comes as a new slide in the project. The default time duration for each slide can be set in Edit - Preferences - Defaults.
However, if the Actions in Real Time option has been enabled, this default time duration will be ignored.
Captions, Click Boxes, etc are also generated automatically depending upon the recording mode you have selected. Refer this article to know more about recording modes in Captivate.
Full Motion Recording: When you record in Full Motion, the actions are recorded in real time, i.e. if you take 6 seconds for a drag & drop action, the slide with this action will also be for 6 seconds. It can be used to record complex things like drawing images in paint or photoshop, etc. But a major disadvantage is that the file size becomes bigger when you use Full Motion Recording. Sometimes, when you are using Automatic or Manual Recording also, you might get some slides in Full Motion Recording. This happens when you do drag & drop or mouse wheel based actions. It depends on the settings you have mentioned under Edit - Preferences - Recording - Settings. Those slides which used a Full Motion Recording will be indicated by a handicam icon in the project.
Manual Recording: Manual Recording will let you choose the screen which should be recorded. The first screen after you start the recording will be captured. After that, you have to use the shortcut (usually the PrintScrn key) to capture a new screen. This shortcut is set in Edit - Preferences - Recording - Keys. This type of recording is not good to explain processes with a lot of steps. But if there are a lot of processes in between your recording, that you may want to remove from the end output, this is a nice way to avoid rework. (If you choose Automatic Recording you have to manually remove all the unwanted slides later. It is better not to record them at the first place.)
Automatic Recording: It is perhaps the most commonly used type of recording in Captivate. When you record using Automatic option, screen captures are done automatically by Captivate and each screen capture comes as a new slide in the project. The default time duration for each slide can be set in Edit - Preferences - Defaults.
However, if the Actions in Real Time option has been enabled, this default time duration will be ignored.
Captions, Click Boxes, etc are also generated automatically depending upon the recording mode you have selected. Refer this article to know more about recording modes in Captivate.
Full Motion Recording: When you record in Full Motion, the actions are recorded in real time, i.e. if you take 6 seconds for a drag & drop action, the slide with this action will also be for 6 seconds. It can be used to record complex things like drawing images in paint or photoshop, etc. But a major disadvantage is that the file size becomes bigger when you use Full Motion Recording. Sometimes, when you are using Automatic or Manual Recording also, you might get some slides in Full Motion Recording. This happens when you do drag & drop or mouse wheel based actions. It depends on the settings you have mentioned under Edit - Preferences - Recording - Settings. Those slides which used a Full Motion Recording will be indicated by a handicam icon in the project.
Manual Recording: Manual Recording will let you choose the screen which should be recorded. The first screen after you start the recording will be captured. After that, you have to use the shortcut (usually the PrintScrn key) to capture a new screen. This shortcut is set in Edit - Preferences - Recording - Keys. This type of recording is not good to explain processes with a lot of steps. But if there are a lot of processes in between your recording, that you may want to remove from the end output, this is a nice way to avoid rework. (If you choose Automatic Recording you have to manually remove all the unwanted slides later. It is better not to record them at the first place.)
May 30, 2012
Custom Menu Buttons / Playbar for Software Simulations
Below Screenr shows how you can create Menu buttons for Captivate Software demonstrations without compromising on the quality. It uses the Rescale project option to create some extra space in the project. The extra space thus created can also be used to make a custom playbar with the project dimensions. (The playbar will have to use Advanced Actions which is not covered in this demo.)
Feb 24, 2012
Variables & Advanced Actions in Captivate - 2
To begin with learning about Advanced Actions, let us try a simple exercise. cpInfoCurrentSlide is a system variable in Captivate which returns the value of the current slide number. We will now try to create a user variable to do the same thing.
- Create a new variable named SlideNo.
o Click on Add New
o Type in the variable name as SlideNo
o Give default value as 0 (zero)
o Type in any description (this helps when you have a lot of user variables in a project)
o Click on Save.
Playing with variables is more or less a logical process. Right now, we have this variable called SlideNo whose value is 0. Our objective is to display this variable in every slide so that it returns the value of the slide number. Theoretically, the value of this variable should be incremented by 1, as it enters a new slide i.e., you add 1 to its value when it enters the first slide, add another 1 when it enters the second slide and so on. Let us see how to do this.
- Go to Advanced actions, and select Create a new action from the menu.
- Type in the New Action Name as SlideNumber
- Double - Click on Add Statement
- Double – Click on Statement (displayed in red)
- Choose Assignment
- A menu will be shown displaying all the variables in the project (including System Variables).
- Choose the variable SlideNo we created in the above step
- In the next field, two options will be shown, Variable and Value
- Choose Variable, and then select the same user variable SlideNo
- Double Click on the operator icon and select ‘Plus’ symbol
- Next time choose Value from the options shown.
- Type in 1 and click on Save.
Now we have successfully created an advanced action which increments the value of the variable by a value of 1. The next step is to execute this action, every time it reaches a new slide. To do this, we double click on the thumbnail image of the slide to display the slide properties. From the menu for On Slide Enter, select Execute Advanced Option. Select, Slide Number in the Action menu.
Unfortunately, the Apply to All slides option is not working for this option. So you have to assign this action for every slide one by one. Use the syntax mentioned in this article to display the variable in your slide.
Note: This is not a good method to display slide number, because if you have branched your slides, or if you go back to a previous slide, the count will go wrong. Anyhow, the purpose of this example is only to show you the use of Advanced Actions and Variables.
Think of any other cases where you can use Variables and Advanced Actions and try to create your own actions. Make a few mistakes and you will learn the trick soon.
Jan 30, 2012
Variables & Advanced Actions in Captivate - 1
“Let us assume that the speed of the vehicle is x km/hr.”
Remember the Math Classes in School? We often use such assumptions to solve Math problems. Here, we are using a variable called x. It is assigned to a value which we are about to find out. All we know is that the variable will have a numerical value (since it is the speed of a vehicle, it cannot be text or characters).
Similarly, a variable in Captivate will have a name (x) and a type associated with it (numerical, text, character, etc). There are two types of variables in Captivate – User & System.
User Variables are created by the Captivate users whereas System Variables are already available in the system. These variables can be used in your Captivate projects to create some advanced interactions and for some interesting displays. We will analyze the system variables first.
Before we proceed, let us first look at the details of a Captivate system variable.

cpCmndCC is a Captivate System Variable, which has a default value 0 (zero). Its description is “Enable/disable closed captioning (CC). Set value to 1 to display closed captions”. So the System Variable cpCmndCC is assigned a value which is equal to the status of the display of closed captions. When closed captions are enabled, the value of cpCmndCC is 1 and when it is disabled, its value is 0. To put it in another way, if we set the value of cpCmndCC to 1, the system will enable closed captioning in your output. You can use this if your course requires closed captioning only in some slides. Even better, you can ask the learners to decide whether they need closed captioning or not. All you have to do is, ask the learners to click on a button, if they require closed captioning. And then assign an action to the button, to change the value of the variable cpCmndCC to 1. (Of course assigning an action is a different process which we will review in another article.) This is just a basic example of how you can use a system variable.
In Captivate 4, press Shift+F9 or choose Project – Actions, and select Variables tab on top.

From the Type menu, choose System.

By default, all the system variables will be listed. However, you can filter them based on the categories available in the View By menu. Choose Movie Control from the menu. You will see the variable we discussed above – cpCmndCC. The value and description is also available for each system variable. Select the different system variables and read its description to get an idea of the value it will return.
Display the Variables (read values of Variables) in Captivate Project
Some of the system variables might be useful to display in your captivate project. Like the cpInfoCurrentDateString variable, returns the date as set on the user’s computer. Let us see the syntax to display this variable in your Captivate project slide. Insert a text caption in your slide and type in as shown below:
$$cpInfoCurrentDateString$$

$$variable$$ is the syntax to display a variable in Captivate project slide. If you would like to add any normal text along with it, type them outside the $$ symbols, e.g.
Date: $$cpInfoCurrentDateString$$ or $$cpInfoCurrentDateString$$ is the last date to submit your entry
Now, we will look at the User defined variables in Captivate. From the Actions Dialog window, select the Variables tab. Make sure that the Type menu is showing User variables. Click on Add New. The Name, Value and Description fields become editable and you can now add the details. Give variable name as b, value as 1 and a description of your choice.

That’s it, you have successfully created a user defined variable. Now you have display the value of this variable too using the syntax mentioned above. To make maximum utilization of the variable, you must also know about the Advanced Actions in Captivate. We will review this in detail in the next article.
Dec 8, 2011
Recording Modes in Captivate
There are four recording modes for Captivate, when you are doing an Automatic Recording. They are Demonstration, Assessment Simulation, Training Simulation and Custom.

You must choose one of them just before starting your recording process. Each mode has some default settings about Captions, Mouse, Click Boxes and Text Entry Boxes. These default settings are based on the Captivate developers’ common sense and I must say, they really have a good sense. J
To see these settings for the different modes, there are two options:
1) If you are about to begin the recording and if you are in the window as shown in the above image, click on the Settings button below.
2) If you are inside the Captivate project, go to Edit – Preferences (Shift + F8), and from the Category box in the left, select Recording – Modes.

By default, the settings for Demonstration mode will be displayed*. You will be allowed to adjust the settings for Captions and Mouse. The Click Boxes and Text Entry Boxes settings will be disabled for editing. Because according to their common sense, in a demonstration video, you only show them the features; you don’t make them click on the interface and add text entries.
Similarly, they also have some default settings for Assessment Simulation and Training Simulation. In these two modes however, they fear that their common sense might be different from ours and they give us the option to change the settings. Apart from that, they also provide a Custom mode where you can define any other setting you require.
An important thing to note is that, whatever settings or mode you choose, you will be allowed to add / remove any of the elements (Captions, Mouse, Click Boxes & Text Entry Boxes) later after recording. The defaults option is only to make your work easier by automatically generating some of the items that you will require for sure.
To make the best utilization of this feature, take some time before starting your recording; and decide the elements you will need most commonly. Don’t think that it’s better to enable all the options first and later delete them if you find it irrelevant. Deleting each item from each slide also consumes a lot of time. Some people (like me) has the habit of highlighting the area you are about to make them click. For them, Add Highlight Boxes on Click is a good option. Enable it before starting the record so that you don’t have to add a highlight box manually in every other slide.
Anytime, if you wish to go back to the Captivate common sense settings, just click on the Restore Defaults option below after selecting the mode.

The Record – Defaults option and the Object Style Manager are also excellent time saving tools while using Captivate. We will look at this in a different article.
*Irrespective of the mode you have selected for recording, by default the settings shown will be for Demonstration mode, simply because it appears first in the drop menu.
Dec 6, 2011
Captivate Backup File
Ever noticed a new file with the same name as that of your Captivate project file and an extension called .bak in the same folder as that of your project file? Well, there is nothing much to worry about it. That's an automatic backup file generated by Captivate for your project folder. Every time you save your Captivate project, the back up file also gets updated.

The main advantage of this file is that in case your project folder gets corrupted or is not opening, you can use the backup file to open original one in the last saved status. All you need to do is, change the extension of the backup file from .bak to .cp, and open the file in Captivate.

A Captivate project may get corrupted due to any of the following reasons:
- Using an older version of Adobe Captivate.
- Copied objects/slides into an older version of Adobe Captivate.
- The Captivate project is located in a network location.
- Using a system that does not meet the minimum system requirement for Captivate.
- You closed a Captivate project improperly (without saving, for example).

- Open the project in the latest version of Adobe Captivate.
- Use the workaround mentioned in this article.
Nov 29, 2011
Change the Speed of Captivate Text to Speech
"Hey...the narrator is too fast. Can you ask him to read the script a bit slower?" Sounds familiar? Welcome to the club. The Text to Speech option in Captivate might not read the script in the best way you wanted it to. Atleast not always. That is why you should use the Visual Tool Markup Language or the VTML tags. Dont worry! You dont have to learn a whole new language to do this.
The language uses some tags and allows you to change the attributes like speed, volume, pitch, etc. of the Text to Speech narration. Given below is the syntax:
<vtml_speed value="value"> Narration Text </vtml_speed>

Here, the value you give in quotes is the variable value given to adjust the speed. By default, it is 100. If you want to make it slower, give a number less than 100. And if you want the narrator to read it faster, give a number above 100. For example, let us say, our script reads - "The term is not very widely used.". If we need a speed which is lower than the usual speed, do the following: in the slide notes section, where we enter the script for Text to Speech, type in as shown below:
<vtml_speed value="90">The term, is not very widely used.</vtml_speed>
I have given a comma (,) after the word 'term' to insert a small pause before the next part of the sentence. If you need to change the duration of pause, you may again use a VTML tag. (Of course, you may also use the edit option and insert some silence.) There are many other similar tags which can be used in the Text to Speech interface. They are listed in this document.
Note: This works for Captivate 4 for sure. However, I am not sure it works in Captivate 5. If anyone knows more about this, please share in the comments section.
Extra Tips:
Changing the pitch of your narration can give you very interesting results. For example, one of my colleagues changed the pitch of her voice over to make it sound like that of a small kid. You might want to have some fun using this option. Enjoy..!!!
The language uses some tags and allows you to change the attributes like speed, volume, pitch, etc. of the Text to Speech narration. Given below is the syntax:
<vtml_speed value="value"> Narration Text </vtml_speed>
Here, the value you give in quotes is the variable value given to adjust the speed. By default, it is 100. If you want to make it slower, give a number less than 100. And if you want the narrator to read it faster, give a number above 100. For example, let us say, our script reads - "The term is not very widely used.". If we need a speed which is lower than the usual speed, do the following: in the slide notes section, where we enter the script for Text to Speech, type in as shown below:
<vtml_speed value="90">The term, is not very widely used.</vtml_speed>
I have given a comma (,) after the word 'term' to insert a small pause before the next part of the sentence. If you need to change the duration of pause, you may again use a VTML tag. (Of course, you may also use the edit option and insert some silence.) There are many other similar tags which can be used in the Text to Speech interface. They are listed in this document.
Note: This works for Captivate 4 for sure. However, I am not sure it works in Captivate 5. If anyone knows more about this, please share in the comments section.
Extra Tips:
Changing the pitch of your narration can give you very interesting results. For example, one of my colleagues changed the pitch of her voice over to make it sound like that of a small kid. You might want to have some fun using this option. Enjoy..!!!
Nov 27, 2011
Enable / Disable Captivate Welcome Screen
Most likely, when you open Captivate, you will see the welcome screen.
 Although there is no reason for this to be disabled, there is an option Dont Show Again at the bottom of this window. So those who do not want the welcome screen (do not really really want), can use this option to disable the welcome screen.
Now what if you want to enable it again? Or what if you clicked it by mistake and want it back when you open Captivate? Go to Edit menu and select Preferences (or use the shortcut Shift+F8). Under the Global category (or the Global -> General Settings category), use the Show Welcome Screen option to enable it again.


Now what if you want to enable it again? Or what if you clicked it by mistake and want it back when you open Captivate? Go to Edit menu and select Preferences (or use the shortcut Shift+F8). Under the Global category (or the Global -> General Settings category), use the Show Welcome Screen option to enable it again.

Nov 24, 2011
How to Create Custom Image Buttons in Captivate?
Summary: This article will teach you to create custom Image Buttons in Captivate. This is helpful when you want to have bigger buttons than given by Adobe. Although its possible to create Text Buttons and increase it to any size, it will not have any color or graphics.
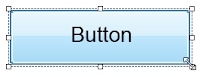
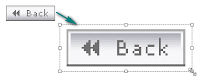
Step 1: Have a look at the existing buttons in Captivate

filename_over
filename_up
When the mouse is over the button, it will display the image with the name Continue_over.
When the mouse is away from the button, it will display the image with the name Continue_up.
Step 2: Create three similar images

Step 3: Save your images

Extra Tips:
(Note: the below mentioned steps are for PowerPoint 2007 & 2010.)
To create the button images from PowerPoint, open a new document and draw a rounded rectangle.
 Modify the border curves to make it look like a button.
 Right click, select Edit Text to insert the text you want to display inside the button.
 When you double-click the shape, the Format menu on top will be enabled automatically. Here you can select from one of the many default styles for the shape that you have drawn. Just hover your mouse over the shapes to see a preview and click on one to finalize.
 Duplicate the shape using the shortcut CTRL+D. With the new shape selected, go to Shape Fill - Gradient. Under the Variations section, you will see that the direction of the gradient you have selected for the shape is highlighted. Select a different variation for the new shape. (This is for the 'over' button image i.e., when the mouse is over the button, a slight variation of the same shape will be shown.)


In Captivate 5, its possible to resize image buttons also, but it wont look good if extended beyond a certain limit.

So given below are a few simple steps to create Custom Image Buttons in Captivate.
- Go to this folder in your system - C:\Program Files\Adobe\Adobe Captivate 4\Gallery\Buttons

- You will notice that there are three images for each button with similar filenames.
filename_over
filename_up
- Down, Over and Up defines the state of the button. If the filename of a button is 'Continue', it will have three images: Continue_down, Continue_over, Continue_up.
When the mouse is over the button, it will display the image with the name Continue_over.
When the mouse is away from the button, it will display the image with the name Continue_up.
Step 2: Create three similar images
- You may use any software to create these images: Photoshop, PowerPoint, CorelDraw or even Paint.
- PowerPoint gives you some custom styles with different colour styles. (Read the Extra Tips at the end of this article to learn how to create the images from PowerPoint.)

Step 3: Save your images
- Save your images with the terminology mentioned in Step 1.
- Do NOT give names of existing Captivate buttons.
- Copy and paste the three files into Adobe Captivate's official buttons folder - C:\Program Files\Adobe\Adobe Captivate 4\Gallery\Buttons
Extra Tips:
(Note: the below mentioned steps are for PowerPoint 2007 & 2010.)
To create the button images from PowerPoint, open a new document and draw a rounded rectangle.


Now duplicate the shape once more and add a different style to the third button. We can use this for the 'down' state of the button.

The last step is to save the button images. Right click on the first shape and select Save as Picture option.

In order to use these images as Captivate buttons, be careful to adhere to the naming conventions mentioned in the above article. Repeat this for the other two shapes. You have thus successfully created the button images.
Nov 23, 2011
How to Choose the Screen Size in Captivate Projects?
What is the optimum size that should be chosen while creating / recording a captivate project? It is one of the most confusing concepts for most instructional designers and e-learning developers. Not anymore! In this article, we will see how to choose the right screen size for any type of project that you are involved in.
There are three things to consider before fixing on a screen size:
- End-user monitor / display settings
- Final output taken from Captivate: swf, html, exe, etc
- The smallest screen size to which you can shrink the application you are demonstrating.
Let us review each of them in detail now.
End-User Monitor / Display Settings
“How do I know the monitor settings of a nerd sitting in some corner of the universe?” If this is what you are thinking now, then you are right. It is not always possible get so much of information about your learners. For those who know, great!!! Lucky you!!! For the others, never mind!!! We can work on the most common lowest setting principle and some guess work. Until some years before, 800 by 600 resolution was the smallest and the most common. But now, most of them have at least 1024 by 768 screen resolution. So let us consider that as the most common setting. (And in case, there is someone who is still clinging on to the 800 by 600 size monitor, let’s give him a chance to change his monitor to a better one.)
So both the lucky ones and the not so lucky ones, either finds out the monitor display settings of the learners or comes to a conclusion on the least common setting. Let us assume this resolution is 1024 wide and 768 high. In such a case, the record size you select in Captivate must always be smaller than 1024 by 768. You will find out the reason when you read the next two criteria. But you will also find out, why it is not always necessary to select a smaller size in captivate. Confused? Don’t worry, just read on.
Final Output Taken From Captivate: .swf, .html, .exe, etc.
Imagine the record size or the project size you have chosen is x pixels wide and y pixels high. For swf and exe output formats, the screen size utilized by the entire output will be as shown in the below figure.

As you can see the output requires, some additional pixels for the player controls and flash player interface. So if you have chosen a screen size of 1024 by 768 in Captivate, there are chances that the player controls may go below the viewable screen area of a 1024 by 768 size desktop resolution. This is OK if the swf or application window is resizable. But there are some portals in which, pop-up files are not resizable. Moreover, there are users who do not know how to resize an open window (yes, there are!!!).
For an HTML output, it is even worse. You need to keep space for the browser interface, which ends up in horizontal and vertical scrollbars. Like in this screenshot:

When your monitor resolution is 1024 by 768 and the project screen size is also 1024 by 768, this is what you will get when you open the html output.
This is why you should always select a record size in captivate which is less than the desktop resolution of the learners. But in case you are taking an swf output and the window is resizable, you can go for a higher screen size. The reason is, when the swf file is extending beyond the screen size, the learners can double click on anywhere on the blue bar on top of the adobe flash flayer to fit it to the screen size.
 Thus, try to understand the behavior of the portal in which you will upload the Captivate output. Will it display in as an html file? Or if it is an swf, can the window be resized, moved etc.

Some of you might be thinking now, that it is then best to select a very small recording size in Captivate. All the learners will be able to view the output then. But before doing that, you might want to read the last criteria too. J
The smallest screen size to which you can shrink the application you are demonstrating.
Let us imagine you have taken a 640 by 480 record screen size in Captivate. Ask yourself (or your client) on whether you would want to use the panning feature in Captivate. Because, if the application you are demonstrating demands more screen size than the one selected, then you will have to either use the pan feature, or pan the application within the limited record screen size. There is nothing wrong in using the panning feature but not all are quite comfortable with this option. New learners might find it a bit confusing.
So at the end, you have to arrive at a decision based on the above three points. Whatever size you choose, it is advised to do a test run using a few slides in the portal you are going to host the video. You might find it confusing in the first few attempts. But you will get the trick of it as you do more and more videos. All the best!!!
Subscribe to:
Posts (Atom)